Let’s be real: creating content fast is easy. Creating good content fast? That’s a different story.
I often found myself stuck not because I didn’t have ideas or copy, but because the visuals just weren’t up to standard. Blurry assets, low-res exports from AI tools, forgotten files from years ago… They dragged down the quality of otherwise great campaigns. I wasn’t ready to reshoot or redo everything from scratch.
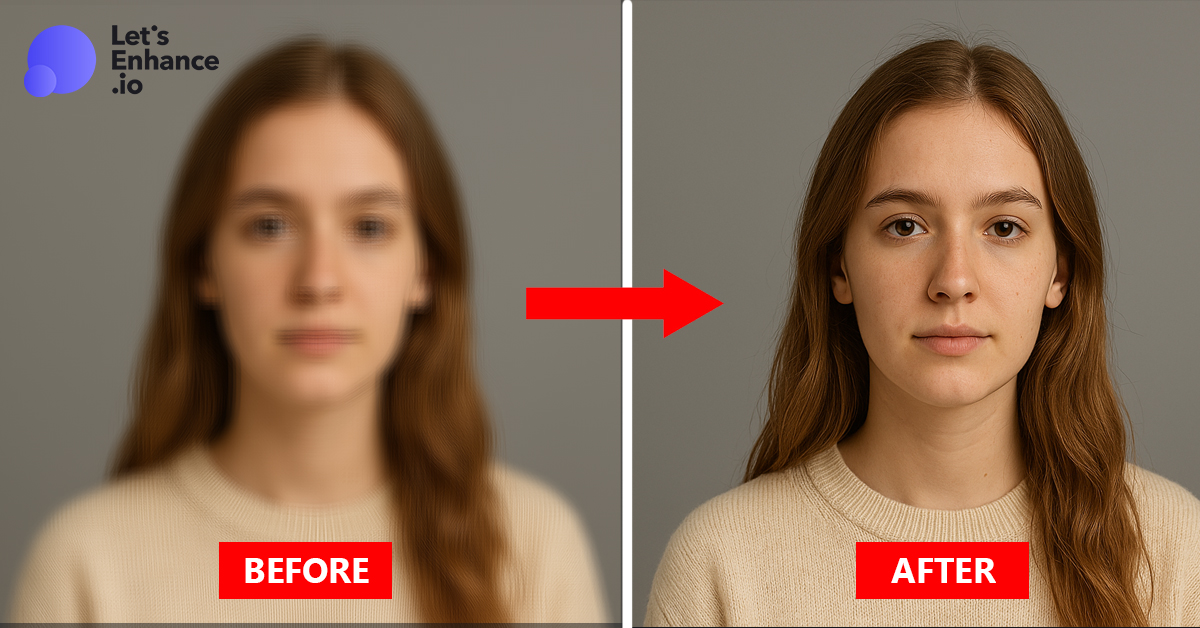
So I tried Let’s Enhance and surprisingly, it solved that visual bottleneck faster than I thought. Here’s exactly how I use it now to speed up my workflow.
Why image quality still matters in 2025
When you’re building content fast, image quality might seem like a luxury. It’s not. Whether it’s a thumbnail, an email hero, or a client pitch deck, blurry or pixelated images undermine the whole message. I’ve had plenty of moments where I needed to reuse visuals, AI-generated graphics that looked fine on screen but fell apart when printed, or dusty assets from an old campaign folder. That’s where Let’s Enhance made a surprising difference. It gave me an easy, reliable way to bring those images back to life, without needing to reshoot, retouch, or dig through enddless settings.
The problem with low-quality images (and traditional fixes)
AI-generated visuals often lack print quality
AI visuals can be stunning at first glance. But when I tried to export Midjourney or Canva images for print? Total letdown. Most of them were capped at screen resolution, fine for Instagram, but terrible for flyers, posters, or even standard A4 layouts. They looked soft, lacked detail, and couldn’t be scaled.
Legacy assets are often too pixelated or blurry
Old brand assets were just as frustrating. I had high hopes for those 2018 product shots and logo mockups… until I opened them and saw the pixel soup. Most were under 1000px, compressed to death, or awkwardly cropped. Useless for today’s standards.
Why manual tools no longer worked for me
Photoshop used to be my go-to. But honestly? I don’t have the time anymore. Between switching layers, filters, sharpening masks and export settings, a single image could take 15 minutes. That’s not scalable when you’re batch-producing visual content. I needed something faster, and smarter.
My process: how i use let’s enhance to upscale and fix images
Step-by-step walkthrough of my workflow
Let’s Enhance is pretty much plug-and-play. I upload the image, select the right enhancement mode, hit process, and that’s it. For time-sensitive projects, that simplicity is gold.
Choosing the right mode: gentle, magic, or digital art?
Each mode has its strength. I lean on “Magic” for product photos because it sharpens and enhances detail nicely. “Gentle” works best on portraits or anything that needs subtle enhancement. And “Digital Art” is my go-to for AI-generated content, especially social visuals with stylized elements.
Real example: refreshing an old product image from 2017
One of my biggest wins was upscaling a 2017 campaign banner. Originally sized for email (and poorly), I needed it for a print catalog. Let’s Enhance took that low-res PNG and turned it into a crisp, 3200px image that was good enough for high-DPI print. No designer needed. No reshoot.
Preparing for print: resolution, dpi and sharpness boosts
Using print presets for large formats
Print jobs used to stress me out. I never knew which resolution or DPI settings were “safe” without risking blur. With Let’s Enhance, I just select a print preset, like “poster” or “A4”, and the tool handles the rest. No guessing, no resizing by hand.
Comparison: let’s enhance vs photoshop
I did try the same task with Photoshop, just to compare. It worked, but took five times longer and required layers of adjustment. Let’s Enhance, on the other hand, gave me results that were 90% there, in less than two minutes. For production workflows, that kind of speed is hard to beat.
If you’re interested in building a more complete workflow around tools like this, you might enjoy this practical overview on creating high-quality visuals 10x faster with AI design tools.
Pros, limitations, and what i’ve learned
What i love: batch edits, clarity, ease of use
Batch processing was the game changer. I could upload ten images from an old photoshoot, hit “process,” and walk away. The interface? Clear, minimal, no learning curve. Even a non-designer on my team could use it. And if you’re exploring tools beyond Let’s Enhance, here’s a practical roundup of the 5 best AI tools for designers to try in 2025
What it can’t fix: extremely blurry or damaged files
That said, it’s not a miracle tool. If a photo is badly cropped or blurred beyond recognition, Let’s Enhance can only do so much. I learned (the hard way) that some images are beyond repair, and that’s okay.
My tips: test modes, upscale only what’s worth saving
Don’t just rely on default settings. I always try two or three modes before choosing the best. Also: don’t upscale everything. Focus on high-impact visuals, headers, thumbnails, product shots, and leave the rest.
Who should try let’s enhance and why
If you’re creating content at scale whether you’re a solo designer, a content manager, or running an eCommerce brand Let’s Enhance is worth a try.
It gave me a way to breathe new life into my asset library, without wasting hours or hiring help.
I still use other tools when I need deep retouching, but for fast, reliable upscaling? This one’s in my daily stack. Try the free version first, but honestly, the batch features alone make the premium plan more than worth it.

Artificial Intelligence Specialist | AI-Driven Workflow Strategist